一、简介
Docker Desktop是Docker公司推出的一款桌面应用程序,它提供了一个用户友好的界面,方便开发人员在本地环境中使用容器技术。
容器是一种轻量级的虚拟化技术,可以将应用程序和其依赖项打包在一起,形成一个独立、可移植的运行单元。Docker Desktop允许开发人员使用Docker引擎来创建、管理和运行容器。使用Docker Desktop,开发人员可以通过简单的命令或图形界面来构建、部署和测试容器化应用程序。它提供了一个本地开发环境,可以在其中运行多个容器,并且容器之间可以相互通信。开发人员可以使用Docker Desktop来模拟生产环境,并进行应用程序的调试和测试。
除了基本的容器管理功能,Docker Desktop还提供了一些额外的特性,如集成的图形用户界面、容器编排工具(如Docker Compose和Kubernetes)、容器镜像管理、网络配置等。它还支持与其他Docker工具和服务的集成,如Docker Hub、Docker Swarm等。Docker Desktop是一款方便易用的桌面应用程序,可以帮助开发人员更轻松地使用容器技术进行应用程序的开发、测试和部署。
Docker Desktop for Windows使用Windows原生Hyper-V虚拟化和网络,是在Windows上开发Docker应用程序的最快、最可靠的方式。Windows版Docker桌面支持运行Linux和Windows Docker容器。
二、安装
我们使用的是官方下载地址:Docker Desktop Installer.exe 下载地址
国内镜像:Windows安装包下载地址
扩展(可忽略): 在Windows上安装Docker时,默认情况下使用的是Hyper-V虚拟化技术,它可以通过使用Windows Hypervisor实现高性能的容器化工作负载。在开机时,按F2 (有的是DEL) 进入BIOS找到虚拟设置(有的在CPU)里,设置开启就可以了。除了通过启用Hyper-v虚拟化的方式在windows中安装Dokcer以外,我们还可以通过安装配置WSL2环境来安装。WSL2是Windows Subsystem for Linux二代的简称,WSL2允许用户在Windows上运行受支持的Linux发行版。当前的Docker桌面版可以使用WSL2作为其Linux后台运行。因此我们需要首先在Windows操作系统上激活WSL2功能才能使用Docker做面板。
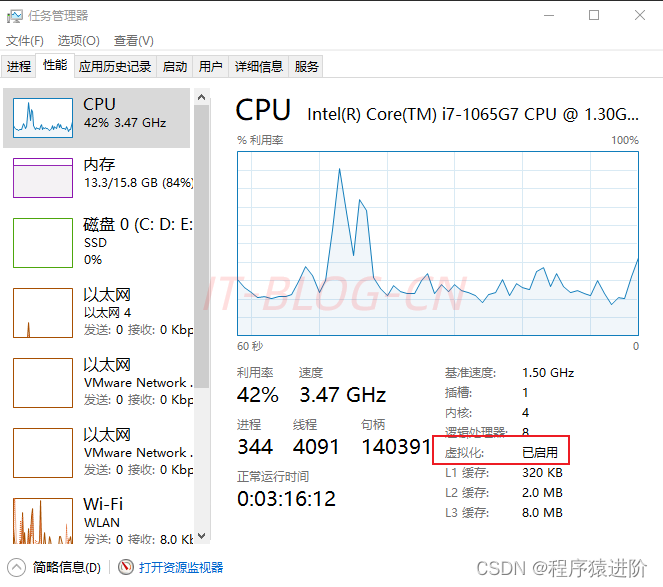
使用Docker Desktop创建的容器和映像在安装它的计算机上的所有用户帐户之间共享。这是因为所有Windows帐户都使用相同的VM来构建和运行容器。请注意,使用Docker Desktop WSL 2后端时无法在用户帐户之间共享容器和映像。
【1】双击Docker Desktop Installer.exe运行安装程序。安装完成点击Close and restart,电脑会直接自动重启。
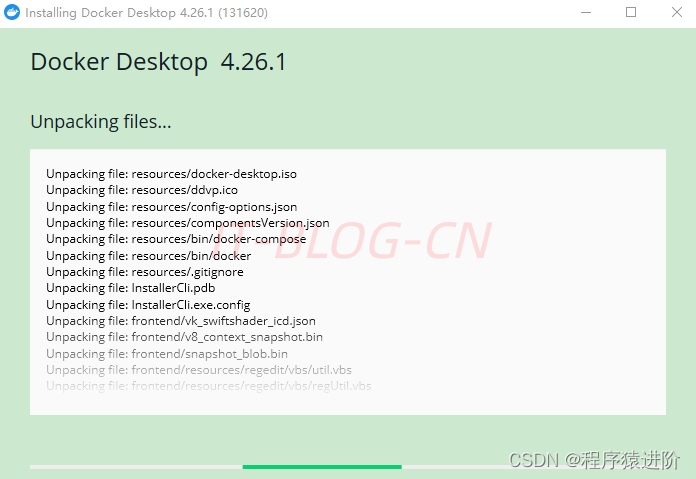
【2】重启之后会提示下图,点击Accept

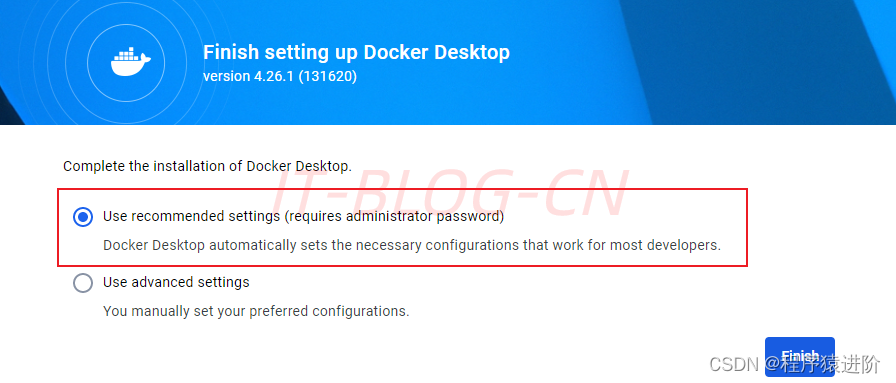
【3】安装完成后,双击Docker Desktop图标启动,我们选择Docker Desktop automatically sets the necessary configurations that work for most developers.自动为大多数开发人员设置必要的配置。
【4】修改镜像配置,然后点击Apply & restart,方案一:
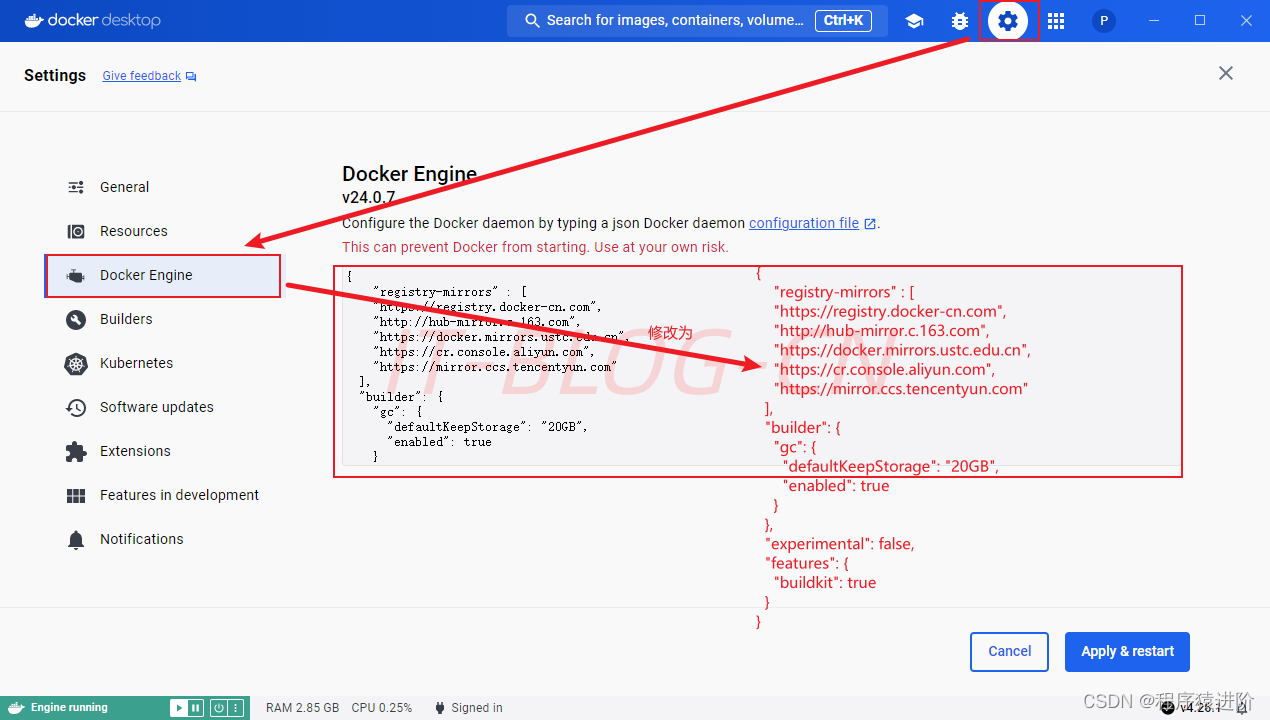
{
    "registry-mirrors" : [
    "https://registry.docker-cn.com",
    "http://hub-mirror.c.163.com",
    "https://docker.mirrors.ustc.edu.cn",
    "https://cr.console.aliyun.com",
    "https://mirror.ccs.tencentyun.com"
  ],
  "builder": {
    "gc": {
      "defaultKeepStorage": "20GB",
      "enabled": true
    }
  },
  "experimental": false,
  "features": {
    "buildkit": true
  }
}
方案二:配置阿里云镜像,进入管理控制台获取镜像加速器地址:镜像加速器
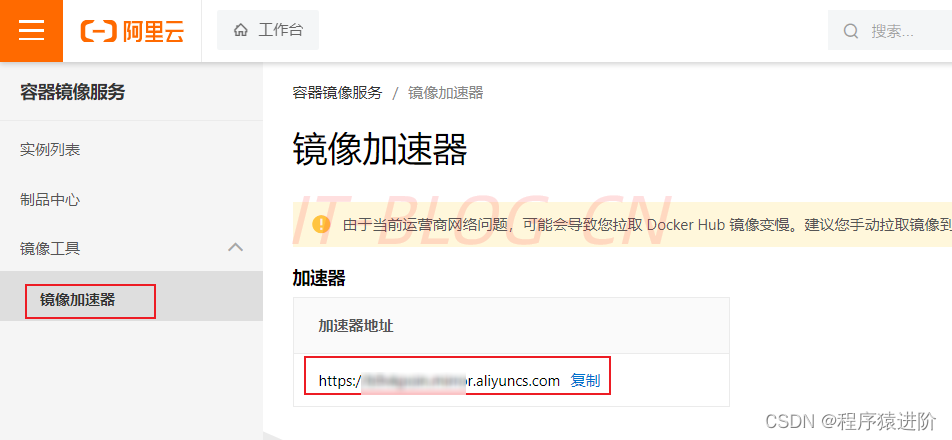
将配置文件中的registry-mirrors 内容替换为自己的阿里云镜像即可。
{
  "registry-mirrors" : ["https://xxxx.mirror.aliyuncs.com"],
  "builder": {
    "gc": {
      "defaultKeepStorage": "20GB",
      "enabled": true
    }
  },
  "experimental": false,
  "features": {
    "buildkit": true
  }
}
【5】在Windows PowerShell 查看Docker版本。
C:\Users\86156>docker version
Client:
 Cloud integration: v1.0.35+desktop.5
 Version:           24.0.7
 API version:       1.43
 Go version:        go1.20.10
 Git commit:        afdd53b
 Built:             Thu Oct 26 09:08:44 2023
 OS/Arch:           windows/amd64
 Context:           default
Server: Docker Desktop 4.26.1 (131620)
 Engine:
  Version:          24.0.7
  API version:      1.43 (minimum version 1.12)
  Go version:       go1.20.10
  Git commit:       311b9ff
  Built:            Thu Oct 26 09:08:02 2023
  OS/Arch:          linux/amd64
  Experimental:     false
 containerd:
  Version:          1.6.25
  GitCommit:        d8f198a4ed8892c764191ef7b3b06d8a2eeb5c7f
 runc:
  Version:          1.1.10
  GitCommit:        v1.1.10-0-g18a0cb0
 docker-init:
  Version:          0.19.0
  GitCommit:        de40ad0
三、验证
【1】hello-world:镜像地址
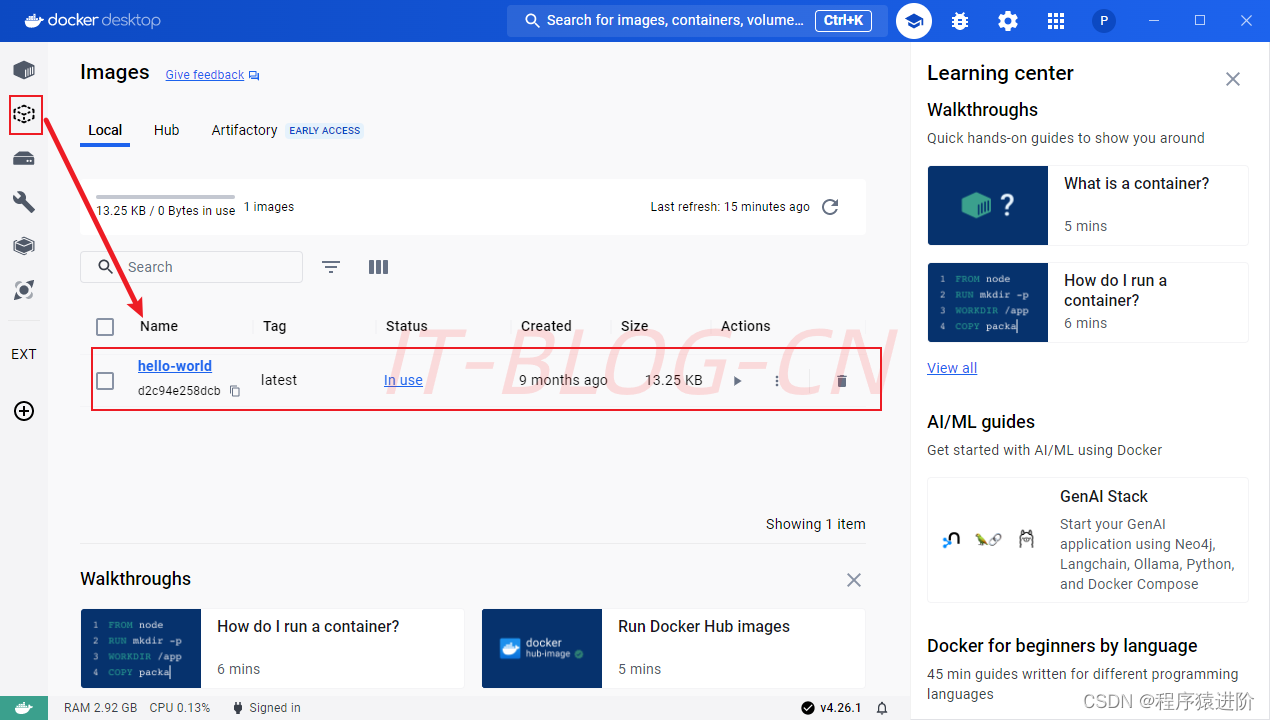
【2】查看Docker Desktop中是否存在hello-world镜像是否拉取成功,如果不存在使用docker pull hello-world命令获取即可。
 【3】打开命令行窗口运行docker run hello-world命令:
C:\Users\86156>docker run hello-world
Hello from Docker!
This message shows that your installation appears to be working correctly.
To generate this message, Docker took the following steps:
 1. The Docker client contacted the Docker daemon.
 2. The Docker daemon pulled the "hello-world" image from the Docker Hub.
    (amd64)
 3. The Docker daemon created a new container from that image which runs the
    executable that produces the output you are currently reading.
 4. The Docker daemon streamed that output to the Docker client, which sent it
    to your terminal.
To try something more ambitious, you can run an Ubuntu container with:
 $ docker run -it ubuntu bash
Share images, automate workflows, and more with a free Docker ID:
 https://hub.docker.com/
For more examples and ideas, visit:
 https://docs.docker.com/get-started/
镜像列表: 我们可以使用docker images来列出本地主机上的镜像
C:\Users\86156>docker images
REPOSITORY    TAG       IMAGE ID       CREATED        SIZE
hello-world   latest    d2c94e258dcb   8 months ago   13.3kB
如有其它疑问,可查看官网:Docker docs
猜你喜欢
网友评论
- 搜索
- 最新文章
- 热门文章
