Celery配置文件
本篇介绍Celery配置文件相关,celeryconfig.py
Celeryconfig.py
在上篇celery基础用法中,是这样使用celery的实例化的。
# tasks.py   文件名需与实例化对象第一个参数一致
import time
from celery import Celery
redis_url = 'redis://Password@IP:port/0'
rabbitmq_host = 'amqp://Uername:Password@IP:Port//v_host'
# 实例化Celery对象
app = Celery('tasks', # 同当前模块名
             broker= rabbitmq_host, # 消息中间件URL,此处使用RabbitMQ,也可使用Redis
             backend= redis_url, # 后端结果存储,使用Redis进行存放
             )
但在项目中,肯定是希望能将配置项统一管理,方便设置。
在celery中,可以使用专用配置模块,针对 Celery 进行配置,编写celeryconfig.py文件并确保它在 Python 路径上可用。
- celeryconfig.py文件
# celeryconfig.py
# 消息中间件地址,示例为RabbitMQ格式
BROKER_URL = 'amqp://username:password@host:port/'
# 后端存储地址,示例为Redis格式
CELERY_RESULT_BACKEND = 'redis://:password@ip:port/0'
# 默认序列化方法,可选pickle(默认)、json、yaml、msgpack等
CELERY_TASK_SERIALIZER = 'json'
# 默认结果序列化方法
CELERY_RESULT_SERIALIZER = 'json'
# 允许的内容类型/序列化程序的白名单。
CELERY_ACCEPT_CONTENT = ['json']
# 将 Celery 配置为使用自定义时区。
CELERY_TIMEZONE = 'Asia/Shanghai'
# 默认启用UTC时区
CELERY_ENABLE_UTC = True
# 表示后端结果18000秒后删除,值为None或0表示永不过期
CELERY_TASK_RESULT_EXPIRES = 18000  # 5 hours.
- 改写tasks.py文件
import time from celery import Celery app = Celery('tasks') # 读取celeryconfig.py配置文件 app.config_from_object('celeryconfig') @app.task def add(x, y): print("start...") time.sleep(5) print("end...") return x + y- 运行

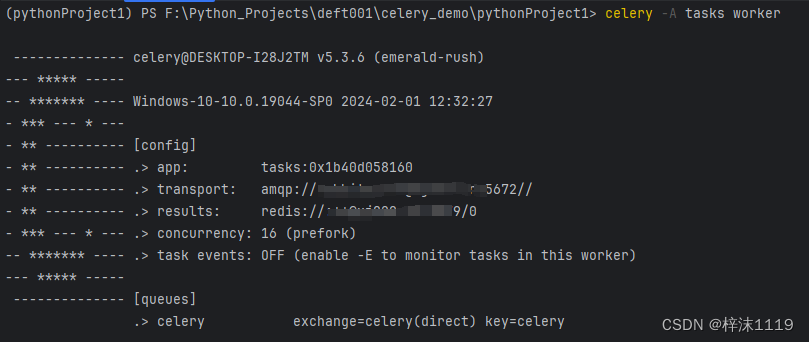
成功运行,可以看到Broker地址,后端Redis结果地址都是从配置项读取的。
- 运行
- 改写tasks.py文件
猜你喜欢
网友评论
- 搜索
- 最新文章
- 热门文章
