一、请求封装优点
-
代码重用性:通过封装请求,你可以在整个项目中重用相同的请求逻辑。这样一来,如果 API 发生变化或者需要进行优化,你只需在一个地方修改代码,而不是在每个使用这个请求的地方都进行修改。
-
可维护性:封装请求使代码更易维护。所有的请求逻辑都集中在一个地方,降低了维护成本。当需要添加新的功能、处理错误或者进行性能优化时,只需修改封装的请求逻辑而无需深入到每个组件或页面中。
-
错误处理:封装的请求可以统一处理错误,提高了错误处理的一致性。你可以在请求拦截器中处理一些通用的错误,例如网络错误、权限问题等,使代码更加健壮。
-
统一配置:通过封装,可以在一个地方统一配置请求的一些参数,例如基本路径、请求超时时间、请求头等。这简化了全局配置的管理。
-
请求拦截器:使用请求拦截器可以在发送请求前进行一些操作,比如添加认证信息、加载 loading 状态等。这提高了代码的灵活性和可扩展性。
-
响应拦截器:响应拦截器可以在处理响应数据前进行一些操作,例如统一处理后端返回的错误码、格式化数据等。这样可以在前端层面统一处理后端的响应规范。
-
业务逻辑分离:通过封装请求,你可以将业务逻辑和数据获取逻辑分离开来。组件或页面只需关注业务逻辑,而不用关心具体的请求细节,使代码更加清晰。
二、之前代码的封装
const  config_url= "";这里写你的域名
const request = (url, data = {}, method = 'GET') => {
	return new Promise((resolve, reject) => {
		uni.request({
			url: config_url + url,
			data: data,
			method: method,
			header: {
				'X-Requested-With': 'XMLHttpRequest',
				"Accept": "application/json",
				"Content-Type": 'application/json',
			},
			dataType: 'json',
			success: (res) => {
				const responseData = interceptor(res.data);
				if (responseData.code === 200 || responseData.code === 500 ||responseData
					.code === 4025) {
					resolve(responseData);
				} else {
					throwErr(res)
					reject(res);
				}
			},
			fail: function(err) {
				reject(err)
			}
		})
	});
};
// GET 请求封装
const get = (url, data) => {
	return request(url, data, 'GET');
};
// POST 请求封装
const post = (url, data) => {
	return request(url, data, 'POST');
};
// PUT 请求封装
const put = (url, data) => {
	return request(url, data, 'PUT');
};
// DELETE 请求封装
const del = (url, data) => {
	return request(url, data, 'DELETE');
};
// 请求拦截
function interceptor(response) {
	if (response.code === -2) {
		uni.showToast({
			title: response.msg,
			icon: 'none',
			duration: 2000,
			complete: () => {
				uni.reLaunch({
					url: '/pages/index/index',
				});
			},
		});
		return false;
	}
	return response;
}
// 处理错误
function throwErr(res) {
	if (res.code == 500) {
		uni.showToast({
			title: res.msg,
		})
	}
}
export {
	get,
	post,
	put,
	del
}
1.main.js注册一下
import App from './App'
import uView from '@/node_modules/uview-ui'
import * as request from '@/api/request';
	// import Lame from 'lamejs'
Vue.use(uView)
// #ifndef VUE3
import Vue from 'vue'
import './uni.promisify.adaptor'
import store from "./store/index.js"
Vue.config.productionTip = false
Vue.prototype.$store = store
//这里注册一下就好
Vue.prototype.$request = request;
App.mpType = 'app'
const app = new Vue({
	store,
	...App
})
app.$mount()
// #endif
// #ifdef VUE3
import {
	createSSRApp
} from 'vue'
export function createApp() {
	const app = createSSRApp(App)
	return {
		app
	}
}
// #endif
2.使用请求
this.$request.post("/sz"这里是路径, {
						这里写携带参数
					}, ).then((res) => {
                        这里写成功之后的
					}, (err) => {
                        这里处理失败之后的
					})
总结:之前的比较拉不好用也可以用,api没写在一块
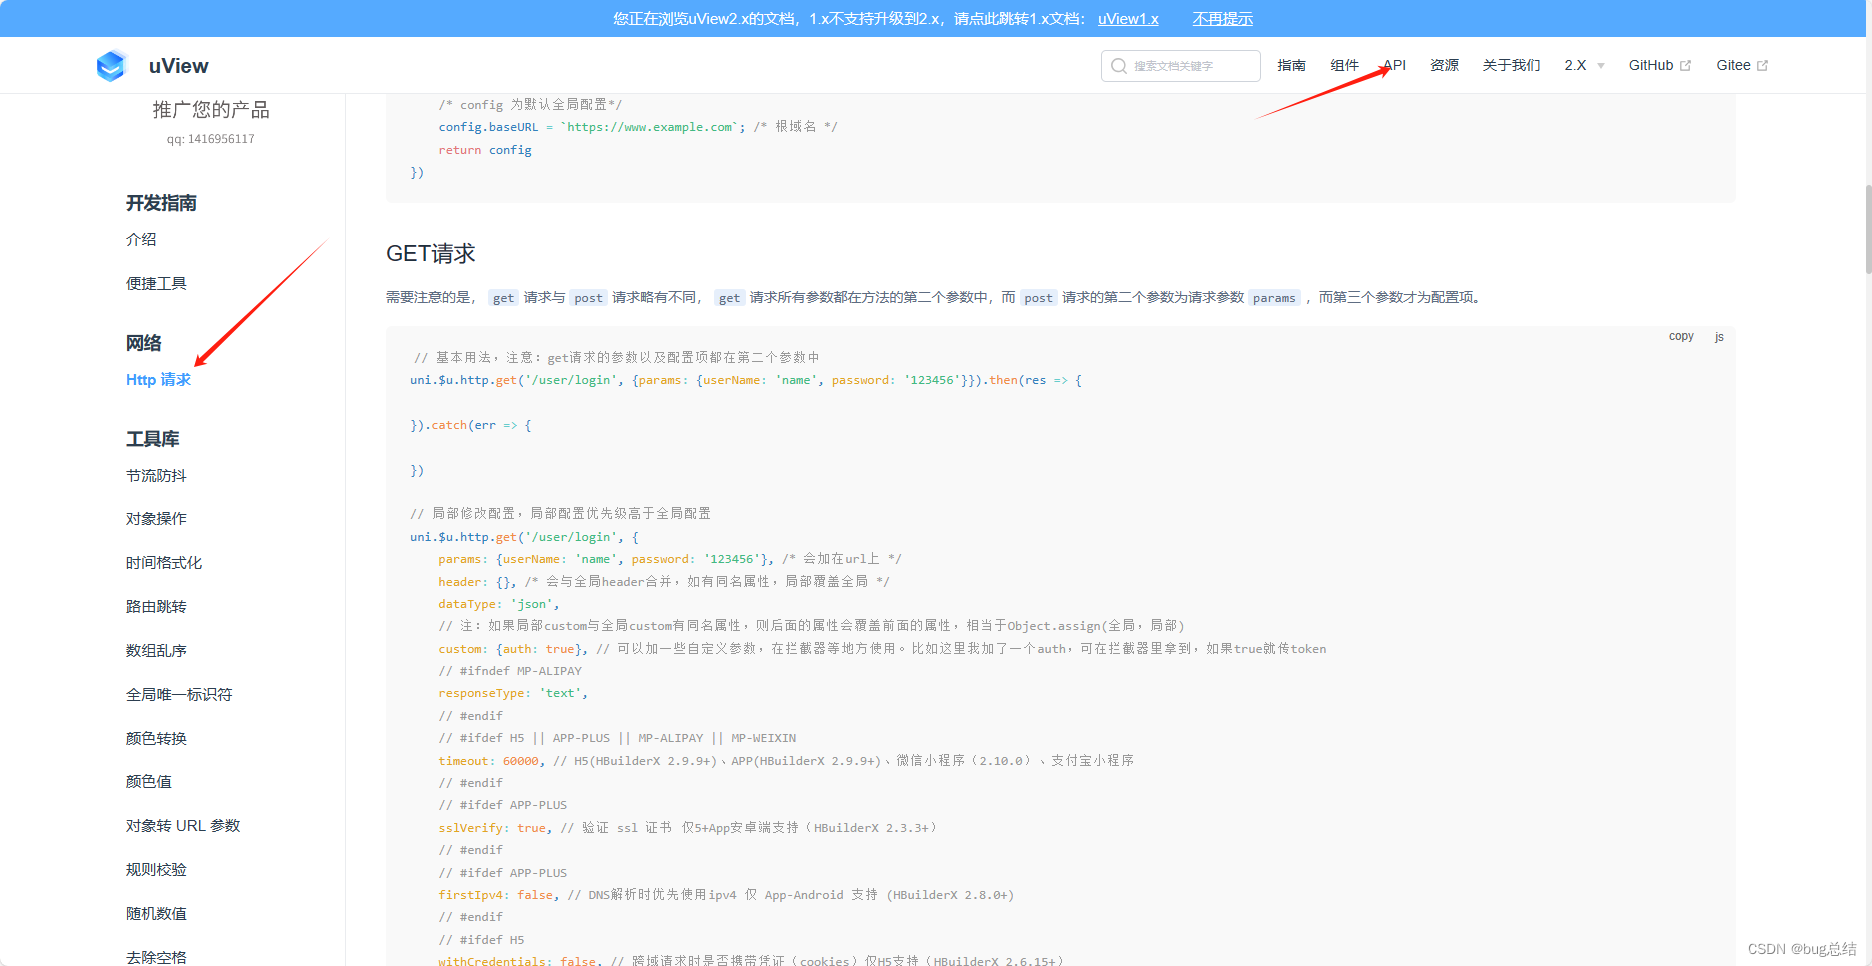
三、使用uview2.0的请求封装 (Http请求 | uView 2.0 - 全面兼容 nvue 的 uni-app 生态框架 - uni-app UI 框架 (uviewui.com))

1.前置条件
安装了uview组件库,才能操作下来的操作
2.首先建两个文件夹存放封装的请求和二次封装的api,代码会放在下面直接用就行

a. request.js
// 此vm参数为页面的实例,可以通过它引用vuex中的变量
module.exports = (vm) => {
    // 初始化请求配置
    uni.$u.http.setConfig((config) => {
        /* config 为默认全局配置*/
        config.baseURL = 'https://httpbin.org'; /* 根域名 */
        return config
    })

	// 请求拦截
	uni.$u.http.interceptors.request.use((config) => { // 可使用async await 做异步操作
	    // 初始化请求拦截器时,会执行此方法,此时data为undefined,赋予默认{}
	    return config
	}, config => { // 可使用async await 做异步操作
	    return Promise.reject(config)
	})

	// 响应拦截
	uni.$u.http.interceptors.response.use((response) => { /* 对响应成功做点什么 可使用async await 做异步操作*/
		const data = response.data
		return data === undefined ? {} : data
	}, (response) => {
		// 对响应错误做点什么 (statusCode !== 200)
		return Promise.reject(response)
	})
}
b. api.js
const http = uni.$u.http
// post请求,获取菜单
export const postMenu = (data) => http.post('/post', data)
c. main.js(把那个request.js引用一下)
import App from './App'
// #ifndef VUE3
import Vue from 'vue'
import uView from '@/uni_modules/uview-ui'
Vue.use(uView)
Vue.config.productionTip = false
App.mpType = 'app'
const app = new Vue({
  ...App,

})
require('@/pages/utils/request.js')(app)
app.$mount()
// #endif
d. 使用的话
postMenu({
				usename: "lijiang",
				password: "123"
			}).then(res => {
				console.log(res, res);
			})
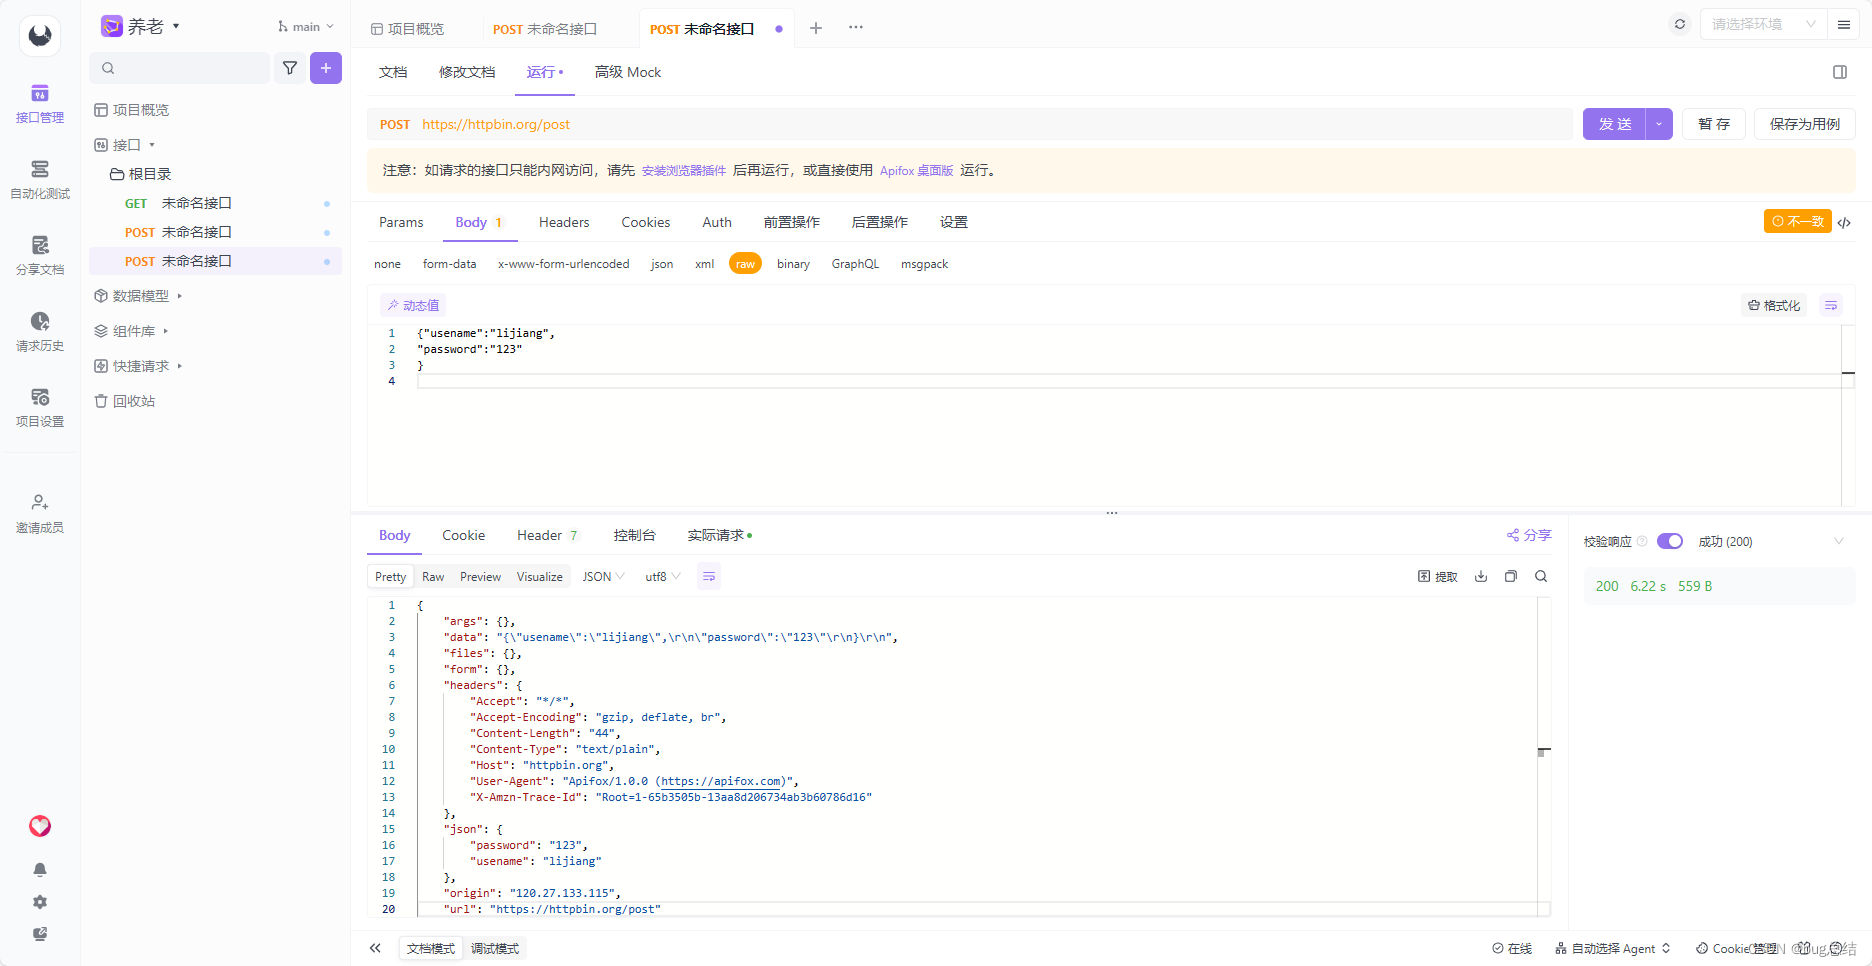
四、接口调试工具(Postman VS Apifox | Apifox 比 Postman 更适合中国开发者)

个人觉得挺好用的你先看下接口能用吗,前面找的接口不能用害我找了很长时间原因
五、接口找的这个博主的感谢get/post在线接口_在线接口请求-CSDN博客
代码直接可用完结,大佬勿喷,有什么问题可私信
猜你喜欢
- 2月前梦中见斗殴流血的心理解析
- 2月前女性梦见经血的心理学解析
- 2月前梦中父亲驾车翻车却安然无恙
- 2月前梦中被狗咬伤的心理学解析
- 2月前梦中被巨型蜘蛛追逐的深层解析
- 2月前梦中遇袭却幸免于难
- 2月前梦见老虎象征哪位仙家
- 2月前女性梦境解析:细蛇的象征意义
- 2月前梦见被蛇咬脚预示什么
- 2月前梦见狗咬手出血预示什么征兆
网友评论
- 搜索
- 最新文章
- 热门文章
